Wednesday, December 26, 2018

Magnolia Seed Pod

Magnolia Seed Pod.


Back in October I had the opportunity to take John Pastoriza Pinol's workshop at Brookside Gardens, and I've been looking forward to sharing what I learned. John is a superb botanical artist who shares the distinction of also being a botanist, and he really knows his stuff.

First, he shared some tips for drawing accurately, focusing on the natural geometry that seed pods and leaves follow regardless of the species, and other botanical features such as leaf veins. Most seeds and pine cones are arranged in a way that follows the Fibonacci mathematical sequence that yields a spiral. How to foreshorten these structures to create a sense of 3-dimensional perspective is always a challenge.

John Pastoriza Pinol at Brookside Gardens workshop.

Explaining natural geometries.

Another technique new to me was the use of masking fluid, and applying it with a calligraphy pen. I had used masking fluid on a watercolor landscape  years before, but I had used a brush (ruining it in the process), and the process seemed so complicated, it hardly seemed worth the time and effort.

John's technique is to mask most of the lines of a drawing, including the outer edges, in order to leave very fine lines on the white paper, something that would be impossible to accomplish with just a brush and washes. Interestingly, this only works on Arches paper, and John explained that this manufacturer uses several layers of cotton fibers sandwiched between layers of sizing. Other watercolor paper manufacturers use only two layers of fiber with a layer of sizing in the middle, so if one applies masking fluid to those papers, the masking fluid will take off bits of fibers from the upper layer when it is removed, weakening the paper on the painted side.

Brookside Gardens had provided us a variety of interesting seed pods and leaves to work with, but I had brought a Magnolia seed pod that I'd picked a few years before that had dried into a very interesting state of disarray, and decided I'd stick with that.


Photo of my Magnolia seed pod.


Drawing this seed pod was a challenge, and putting masking fluid over the complicated line work, even more so. Once the masking fluid had dried, I was ready to start painting with very pale washes: Vanadium Yellow first, in the area immediately surrounding the highlights that were to be left white, which John referred to as the areas of "moon-glow." After this wash had completely dried, it was followed by a wash of Perylene Red in the areas of body color, and after that dried,  a wash of Cerulean Blue Hue for the shadow areas. As you can see, these pigments are very transparent, barely visible here. This was as far as I got on the second day.


Step 1: pale washed in primary colors.


On the last day of the workshop, stronger color was introduced: first a wash of Quinacridone Gold, then a chestnut color mixed from Quinacridone Gold with a bit of Perylene Red. When that was thoroughly dry, the mask was removed. We didn't have much more time, but John demonstrated how to begin the soften the edges of the masked lines to give the illusion of depth with a damp stiff-bristled brush called a Cosmotop spin. This works well with leaf veins also. The idea is to use a drier brush with each successive layer to build up the colors in a painting.

Step 2: gold and chestnut washes.

I wish the workshop had lasted a few more days, so that I could have learned ways to further refine my piece. As it was, I worked on it in the following weeks, gradually building up the darker colors layer by layer until getting what you see at the top of this post. I'm not sure it's quite finished yet--I may add a seed falling off or a fallen seed or two to the composition.

Sunday, December 9, 2018

Little Brown Jugs


Variable-Leaf Heartleaf (Hexastylis heterophylla) and Little Brown Jug (Hexastylis arifolia),
watercolor with colored pencil, 17"h x 14"w.


Here's my most recent painting: an illustration of two unusual plants from the forests of southwestern Virginia. Hexastylis are part of the Aristolochia family (Pipevine), and considered a segregate of the genus Asarum (Wild Ginger). These plants are native to the eastern US forests and like Wild Ginger, have inconspicuous flowers that hide under the foliage. The flowers are pollinated by ants and/or beetles.

I saw these plants for the first time during a Virginia Native Plant Society (VNPS) spring field trip to this area in 2017. The unusual flowers, the "Little Brown Jug" (Hexastylis arifolia) and the weirdly-mottled, elaborate flower of the Variable-Leaf Heartleaf (Hexastylis heterophylla), intrigued me, and I wanted to illustrate both plants in one painting.

The flowers bloom in the spring just as the leaves are emerging from the ground. I worked from a number of different photos, some taken in different locations, so it's quite possible that the mature leaf on the lower left is actually yet another species, Hexastylis virginica--there were no flowers on that specimen photographed in Pandapas Pond in late summer.

Line drawing in ink


As usual, I started my painting with a pencil drawing and once I'd settled on a final composition, inked the lines to trace onto the watercolor paper. At first I had thought of including a lovely orange eft (a juvenile salamander) photographed at a different location during the same trip, it was such a neat thing to capture on film! You can see a bit of the drawing of the eft under the tracing paper here, but I discarded this idea as detracting from the original intent, which was to focus on the unusual flowers of these plants.

First stage: colored pencil on the flowers with watercolor underpainting.

Unfortunately, I didn't take any other photos along the way to the finished piece. The hardest part of the painting was deciding how much of the leaf litter to include, and how to shape it to give continuity to the painting while presenting the plants in context. I hope the finished painting gives the impression of looking at a small piece of the ground in the woods.

Friday, November 30, 2018

The Ginko Grove at Blandy

The Ginko Grove at Blandy Farm, watercolor, 10" x 14."

The Blandy Sketch Group had its last plein air outing on Halloween. The day turned out to be the last really warm, sunny day of the season, with temperatures in the 70's. What better way to spend a nice afternoon than painting in such a lovely setting?

The ginko grove lies at the very back of the Blandy Farm Virginia State Arboretum property, and was planted as an experiment to determine the germination ratio of male to female trees from seed (which turned out to be about 50-50).  Because the female ginko fruit is foul-smelling, planting female trees on city streets was banned during the early years of the 20th Century. Since tree nurseries seldom, if ever, sell female trees, this was the first time I'd ever encountered the offensive fruit, which was thick under the female trees. I'm glad we were warned to bring old shoes--it took almost a week of airing on the porch for the smell to wear off my gardening shoes after our excursion.

The leaves were just starting to turn yellow, so the grove was not as spectacular as I'd hoped, but the hollow with the Blue Ridge Mountains as a backdrop was still quite a sight. I hope my watercolor sketch conveys a bit of its charm. Here's a photo at the actual location.

Ginko grove at Blandy Farm

Sunday, November 18, 2018

Late Fall Color

Back yard in early morning light.

This fall had been so warm the leaves didn't start turning until late October, and didn't reach their peak until the first week in November. The leaves were not as colorful as in other years, perhaps because we had such a rainy September... Then as they were showing their best, a gale stripped most of them in one afternoon.

Back yard mid-morning
Front yard on Halloween

Side yard with Autumn Blaze maple.

The purple aster flowers (Symphiotrichum oblongifolium) have lasted a long time--the two small offshoots I split from the original clump and planted in the back beds also bloomed, though they probably won't reach the size of the first clump for another year or so. I divided the Thalia daffodils in the front yard and re-planted a bunch, the leftovers went in one of the back beds along with more daffodils. The other daffodils in the front beds probably could have used the same treatment, but I didn't have the energy to dig them all--they will have to wait another year.

Purple Asters (Symphiotrichum oblongifolium)

Taking advantage of the end of the season sales, I acquired a new Peony, 'Bartzella' (a lovely hybrid of a herbaceous and a tree Peony with yellow flowers), and a few more shrubs and bulbs. Most of these are already in the ground, but a few late purchases won't be shipped until next week. With the increasingly shorter and colder days, not to mention the frequent rains, it's getting harder to find decent weather for my garden chores now--the windows of opportunity present themselves less often.

West side garden

Just as I was finishing this post, our first snow arrived on Nov. 15, setting a record not seen in the past 22 years. The accumulation ended up being about 3-4", enough to lend a nice touch to our view, and as chance would have it, my plant order arrived exactly on that day! The weather has made it impossible to plant anything until the snow melts, which will take a few more days. I expect there may be at least one day next week when I can finally get those late arrivals in the ground.

Mid-November snow

Soon the ground will freeze hard and it will be time to put the garden to sleep for the winter. My gardening will then be confined to poring over colorful plant catalogs and dreaming... It's the season to spend my days in the studio working on paintings, remembering the glories of the past season, and looking forward to another spring.

Wednesday, November 14, 2018

Levant Cotton Painting

Levant Cotton (Gossypium herbaceum 'Nigra'), watercolor

Here is my finished painting of the Levant Cotton for the US Botanic Garden. I hope it gives a good sense of the plant's characteristics, its lovely flowers, unusual foliage and fruit (the bolls), as well as the way the bolls open when ripe, displaying their cotton-wrapped seeds.

I plan to take the painting to the USBG in the next week or so to be scanned, the image will become part of their collection. The original painting will be returned to me and will be offered for sale then. If you are interested in purchasing it, please contact me to request the price.

Thursday, November 1, 2018

Artist in Residence at US Botanic Garden

Painting at the US Botanic Garden


The first week in October was my week as Artist in Residence at the US Botanic Garden in Washington, D.C. This unique opportunity came my way as a member of the Botanic Artists Society of the National Capital Region (BASNCR), a regional chapter of ASBA. In conjunction with the American Society of Botanic Artists' (ASBA) exhibition: Botanical Art Worldwide: America's Flora displayed in the West Gallery, the USBG presented the "Botanical Art in Action" program as a way of showing the public how botanic artists create their work. Artist members of the BASNCR volunteered and were assigned one week for each of us to be present and create a work from the garden's collection.

We were asked for our preferences in plants we'd like to illustrate, and I gave my first choice as the ornamental Black Cotton (Gossypium herbaceum 'Nigra') AKA Levant Cotton, a plant I'd admired a few years back when they had some lovely specimens growing outdoors. I'd collected some cotton bolls with seeds at the time, and planted them in my garden the following spring.

My plants didn't grow as well as theirs, of course (I have very poor soil), and the seeds from them turned out to not be viable, but I had a chance to see the unusual blossoms, which were beautiful! It was primarily the flowers that had beckoned me to choose this plant to illustrate, though the bolls are also lovely.

The USBG staff found me a nice specimen to work from, but as expected, it was too late in the year for flowers. No problem--the plant had many well-developed bolls, and I had brought some of my photos of the flowers to try to incorporate them into my piece.

The specimen.

The specimen was quite large, my first problem was how to approach the drawing--with just a few days to work there, doing the entire plant would be an impossible task. The only solution was to simplify: select one or two typical branches and focus on those. With that in mind, I set out to capture those branches in a line drawing and compose the arrangement.

Step 1: a line drawing.


The leaves were a challenge because they varied considerably in shape, and folded and bent in particular places, making them look very different from different angles. I traced my first drawing over a couple of times to correct the proportions, and broke up some of the stems to come up with a pleasing composition. This process took up the first day, while I answered questions about what I was doing and chatted with a number of visitors that came into the gallery.

Since I live some two hours away, I'd planned to spend two nights with my sister who lives in the northern DC suburbs, to cut down on my mileage. The rush hours traffic in the DC area being what it is, the actual travel time was only a bit shorter than from my house, but it was still a big help.

The following day I laid a piece of tracing paper over my drawing to do a shade and shadow study. While I was doing this, I shared the gallery with a class of some twenty 8-10 year old children who were learning how to re-pot an orchid.  Despite the added noise, listening to their class was a lot of fun. I was impressed by how well-behaved these children were, how engaged, and how the instructor was throwing them some pretty big words such as "epiphytes" and "terrestrial." After the class I asked what school they were from and was told they were from a charter school in DC--good for them!


Step 2: a shade and shadow study.

I added a detail of an open cotton boll in the empty corner in the afternoon. Once I had this shade and shadow study, I felt confident enough to start tracing my drawing in ink, ready to transfer it to the watercolor paper. I finished my tracing by the end of the second day there.

The following day I was ready to start painting, but since the unusual colors of the plant were so challenging, I thought it best to do some practice on a separate swatch of paper first. The artificial lighting also changed the colors somewhat, making them even harder to render.

The plan in artificial light.

Step 3: color practice strip.

My theory was that the underlying color should be green, overlaid by a reddish-purple wash. As a test, I did the leaf on the right using this approach, and the one on the left with the opposite--the red-purple wash below with green on top.  Applying the green first seemed to yield better results, so I went with that. Now I was ready to start the piece in earnest.

I started with the cotton boll on the upper left, laying in the shape of the cotton first, then the pod. while the washes dried, I began laying in the color of the flowers at the upper right. This was as far as I got by the end of the third day.

Step 4: painting the boll and flowers.

I stayed home the next two days to work on my garden and celebrate Herb's birthday, then drove back to USBG on Saturday morning. As anticipated, there were more people here today than on the previous weekdays, and I talked to a wide spectrum of visitors from many different states and abroad. It's a wonder I managed to get anything done, as I continued to add detail to the boll and flowers, while working in the greens of the leaves.

Step 5: underpainting the leaves.

At the end of the day, I had the underlying green for a few more leaves. The next day was our BASNCR quarterly meeting, and I would have no time for more painting. I'd have to finish the rest of the painting at home, relying only on my reference photos and sketches. During the first week after my on-site work, I put in the colors on the leaves and the first unopened boll on the left.

Step 6: more leaves and stems.

Step 7: the first boll and more leaves.

Step 8: two more bolls, leaves and stem

After letting the green wash settle for some days, I started putting the second, purplish-red wash over the leaves. Painting the larger leaves was particularly daunting--I was afraid that the green wash would run if the second wash was too watery.

Step 8: finishing color of the leaves

I was one leaf away from finishing the second wash on the leaves when I took a break to attend John Pastoriza Pinol's wonderful botanical art workshop at Brookside gardens. I wish I'd known about John's theories on color and transparency before I'd started on my piece, I would have taken a very different approach to my palette selection. But, even in these last stages, I learned enough to want to modify this piece to some extent. I've been working on the leaf surfaces and veins, trying to bring in more detail: the veining and reflected light, as well as the light on the bolls, and more color overall into the piece.

This story has taken so long to develop and write, I'm going to close this post now, without the finished piece, and show the modifications on the finished work in the next post.

Wednesday, October 17, 2018

Fall Garden Glories

Purple Asters and Sunflowers

Sunflowers on the west side
Every fall it's a thrill to see my Narrow-leaf Sunflowers (Helianthus angustifolius) come into bloom, and then the purple asters (Symphiotrichium oblongifolium) gradually begin to open... the butterflies and bees love these. This year I've seen more monarch butterflies in my yard than ever.--they look so lovely sipping nectar from the flowers!

It's still quite warm, and most of the leaves are holding onto their summer colors, with the exception of the dogwoods. The one in front is particularly colorful this year.


Front yard.

The red Dahlia I had planted earlier finally produced one beautiful bloom--it's so late in the season I doubt there will be more than a few flowers, but what is there, is 'cherce'. I wish I had the time to paint it, but first, it's time to start fumigating and bringing in the houseplants that summer outdoors--the first frost is probably just around the corner.

Red Dahlia

Back yard beds.

The beds in the back yard continue to expand and be filled: a few more evergreens and perennials near the deck, more Coneflowers and Chrysanthemums in the beds behind. It'll take a few more years of growth before the beds begin to look full, that is if the deer and rabbits don't eat them back. This summer the rabbits ate two out of the three red Salvias I put in, but they didn't touch the marigolds--I'll plant more marigolds next year.  

Wednesday, September 26, 2018

Plein Air in the Shenandoah Valley

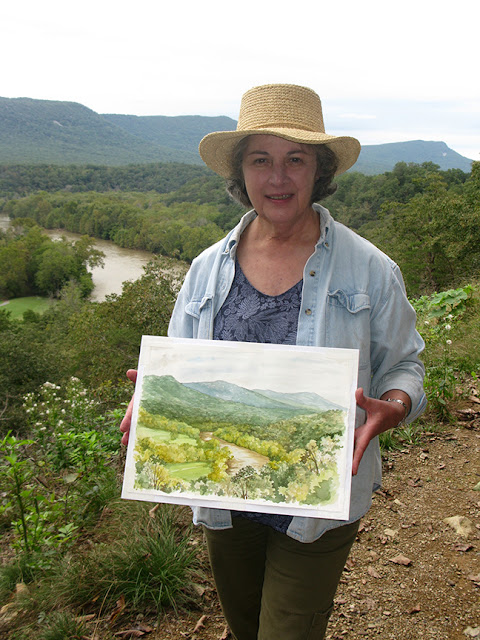
The Shenandoah River from Culler Overlook, watercolor, 10" x 14"

This past Saturday was the Plein Air Paint Day organized by Art in the Valley Gallery in Front Royal. The event coincided with the Annual National Public Lands Day, so everyone could enter the Shenandoah River State Park without paying the usual entry fee. This was a perfect opportunity for me, since I'd yet to visit this state park some five miles south of our town.

It was drizzling lightly when I woke up, and I was worried that our plein air day would get rained out, but the forecast didn't call for rain, just cloudy and overcast. So I packed up my gear in the car, made a sandwich for lunch and headed down to the gallery for our check-in. The gallery owners and staff are so nice! They had coffee, tea and scones to munch on at the gallery, and they had prepared goodie bags for all of us artists with water and snacks to take with us.

I arrived at the State Park and proceeded to Culler Overlook, which I'd been told gave the best panoramic views of the river. The view didn't disappoint--the wide bend of the river here reminded me a bit of the famous view of the Chama River in New Mexico, except that our hills here are covered with greenery, and show little of the underlying rock.

Two painters were already standing at the overlook--one gentleman had his painting well under way, and I recognized the other gentleman as Armand Cabrera, whom I'd met in the gallery at one of the opening receptions. Armand had not started on his canvas yet. I figured it might be a little too crowded with three of us there, so I walked down the trail leading below and found a nice spot under the shelter of some trees, just below the boardwalk--perfect!

I went back to my car and brought my gear and chair down. My working surface was relatively small--one quarter of a watercolor sheet, so I decided to paint only one side of the bend of river, to simplify the composition, and that worked.

After about an hour or so, another painter came down to the same spot to join me. I'd met Laura at the gallery before, but had forgotten her name. She told me she'd started blocking in the composition for her oil painting the day before, and set up behind me. Unfortunately, she seemed to be using turpentine (yuck!) rather than the less vapor-laden turpenoid and the fumes wafting down weren't pleasant. I tried my best to ignore it--thank heaven we were outdoors, and I could get up and walk around a bit to get away from it when it became too much.

After a while a young man showed up, who introduced himself as Casey and told us he was working with the gallery to take photos of the artists during the event. We obliged him by carrying on while he took his photos. Around twelve-thirty I took my lunch break, drove down to the visitor's center to use the bathroom and came back to eat my sandwich.

As the afternoon wore on, Laura and I chatted and I felt comfortable enough to tell her that she should ditch the turpentine because of its health hazards, and use turpenoid instead, with gloves on her hands to keep from absorbing toxins through her skin (she was picking up a lot of paint and turpentine on her hands). All these useful things I learned from my previous association with the Mid-Atlantic Plein Air Painters Association (MAPAPA), bless them!

The one good thing about having a cloudy day was that the light stayed consistent throughout the day, allowing for plenty of time to work on our paintings. It rained all of the next day-- almost an inch of rain-- so we were very lucky to have had the plein air painting on Saturday after all.

The paintings will be on exhibit at the gallery starting Oct. 12--can't wait to see what everyone else came up with!


Friday, September 21, 2018

Presage of Fall


Hardy Begonias

Another very rainy spell brought almost five inches to our area this past weekend. The welcome cooling was a presage of the fall equinox rapidly approaching. Other signs are present in my yard as well.

Hummingbird Clearwing Moth caterpillar?

I noticed that something was eating the leaves of the lovely Viburnum 'Brandywine' and found the culprit--a caterpillar I've never seen before. After consulting an insect identification site I think this may be a Hummingbird Clearwing Moth caterpillar. The coloring is a bit different than the photos on this site, but the small spots on the sides are identical, and we have seen these moths flying around our yard, so it's likely this is one. My first impulse was to get rid of it, but since this is part of the moth's life cycle, I don't mind sacrificing my Viburnum leaves for its sake. Butterflies and insects are, after all, part of the balance in a garden.

 
Beetles on Hoary Mountain Mint (Pycnanthemum incanum)

Some are nuisances, like the milkweed beetles which feed on the seed pods of the Butterfly Weed (Asclepias tuberosa) but are also appearing on other plants such as the native Hoary Mountain Mint. I read that these beetles a not a threat to the plants except for its seeds, so I'll probably just pull off the seed pods and see if that doesn't get rid of the beetles.


Seed pods of Butterfly Weed (Asclepias tuberosa) covered with Beetles

Other fall-bloomers are beginning to make a show, like the sedums and mums. Crabgrass has multiplied like crazy during this unusually-wet summer, and it's been just about impossible to keep up with the weeding.

Sedums 'Neon' and 'autumn Joy'

Chrisanthemums

I guess it's time for me to get to work digging holes for all the new plants I bought this spring that summered on the porch and the deck in pots. Tomorrow is the fall Equinox, and I'll be painting Plein Air with a group of local artists at Shenandoah River State Park.

Tuesday, September 4, 2018

Working on a New Painting


Rhododendron maximum

 A couple of weeks ago I started on a painting of the native Rosebay Rhododendron (Rhododendron maximum) flowers that I'd planned for some time. This tree-sized Rhododendron flowers late in the year, from mid-June to as late as July, depending on the location and exposure. The photo above is my specimen, and it was taken during a trip to Mountain Lake Biological Station a few years back. I had been saving this image, with a few other supplementary ones, until I had some time to develop a painting.

I "edit" my photos whenever possible so that the composition is already close to what I want--in this case, a branch with two lovely flower clusters. The problem here was that there was another branch crossing  the focal one, which had to be "edited" out in the drawing. After the usual steps of drawing and transferring the line drawing to the watercolor paper, I was ready to start laying in some color.

Step 1

I began with some pale washes of lavender on the central cluster to articulate the form of the flowers, and after that was dry, put in the touches of pink. The buds of this plant are tinted a beautiful, pure pink at the tip, which fade to a pale pink, or even white, after the flowers open. After the flowers were dry, I added the characteristic dots on the petals, and the darks of the bud scales behind, to define the outlines of the petals.

Step 2

Then I repeated the same process with the second flower cluster. This one shows more of the unopened bud covered with their orangey scales. Once this was done, it was time to start on the leaves. The leaves of this Rhododendron have a dull shine, but they still have some blue reflections from the sky. I started with a wash of light blue and a bit of yellow-green for the main vein and let it dry. Rewetting  one half of the leaf, I then began to fill in the leaf with dark green, lifting portions of the wash to suggest the shape and the veins.

Step 3

The leaf  was not very successful, so I re-wet it and lifted more color for better balance. After it dried again, I added touches of deeper green here and there to bring out the veins. This process was repeated for each leaf except the one on the right, where the underside of the leaf shows--the color of the underside is yellower and has no shine.

Step 4

Step 5

After the leaves were complete, and the woody stem, the flowers appeared too pale in comparison, and my composition seemed to have a "hole" at the top of the focal cluster. I added two unopened buds for a bit more interest, but the flowers still need something more to punch them up. I'm in the process of using colored pencils on the flowers (light gray and sepia) to try to define and bring out the edges more. I'll post the finished piece soon.