Sunday, March 30, 2014

The Rare Fringed Blue Gentian

Fringed Blue Gentian (Gentianopsis crinita).

This year the Botanical Artists Society National Capitol Region (BASNCR) Annual Exhibition is focusing on native plants. Looking for a native plant to illustrate, I remembered my field sketch and photos of the endangered Blue Fringed Gentian (Gentianopsis crinita) that I had come across a few years back at Soldier's Delight when I lived in that area (see post excellent-adventure-at-soldiers-delight).

I dug the sketch and photos up and chose one I particularly liked, with the seed pods forming and strong side lighting, for the main part of the composition. On the lower right side I added two flowers showing some of their lovely details. The flowers of gentians open fully only in bright sunlight and begin to close as the sun starts to go down.

Tuesday, March 25, 2014

Following the Fertilized Orchid

Fertilized flower development (on right).


Continuing my observations of orchid fertilization, this is what the developing ovary of the fertilized phalaenopsis hybrid orchid looks like after a couple of weeks plus a few days. The thickening of the inferior ovary with its ridges is very noticeable now, compared with the unfertilized flower on the left. The fertilized flower is losing its color and the petals are fading. A seed pod should develop eventually (orchids are notoriously slow in this respect).

Here is what the front of the fertilized orchid looks like:

Fertilized Phalaenopsis hybrid after approximately one week.

Fertilized Phalaenopsis hybrid after two weeks plus a few days.

Unfortunately, the hand pollination of the other variety of orchid hybrid did not "take" at all--after about ten days those flowers faded and fell off. I figure the pollen grains must not have made proper contact with the stigma, or they were not quite ripe, so the pollen tube did not develop at all. Two days ago I decided to give it another try--this time I separated the two tiny pollen sacs and attached one to the sticky substance on the stigma. The same reaction observed before, of the tips of the tiny "bonnet" on the column closing is starting to take place. Only time will tell if fertilization has been successful this second time.

Saturday, March 15, 2014

Blue Gentian: the Finished Painting

Blue Gentian (Gentiana scabra) watercolor, 13.5" x 14.5"

Here at last is the finished painting of the Blue Gentian. This is my entry for Brookside Garden's Botanica 2014 exhibition, which will be on view from June 28-Aug. 8, 2014.

Saturday, March 8, 2014

Botanical Observations

Fertilized orchid flower.

In the attempt to better understand the botany of orchids, I decided to hand-pollinate a couple of the orchids I have blooming around the house and observe what happens. I took one of my small painting brushes and detached the two tiny pollen sacs (pollinia) from the anther of one flower and deposited these on the stigma of another (the pollen sacs in the flower above were left intact). The pollen sacs seemed to have a sticky substance that gladly stuck to the stigma. I did this proceedure on two of the flowers of this unnamed species (the mystery hybrid purchased at a Florida roadside stand).

Compare fertilized orchid flower (on left) with unfertilized flower (on right).

About four days later I looked and there were some noticeable differences between the flowers that had been fertilized and the others: the column had subtly changed color and appeared slightly swollen. The next morning I took these photos in bright light to look more closely--voila!

Comparing the fertilized flower on the left with the unfertilized on on the right, the most remarkable change was that the tiny appendages on either side of the column that forms a little bonnet over the anther had moved down to clasp each other and enclose the column. The fake "bee" formation on the labellum that lures and guides the pollinator had withered and lost all coloration, signalling to the prospective bee that the flower was now closed for business.

In fact, the color of the entire labellum had changed to a dark red and the petals and sepals were starting to become papery and thin, another indication the flower would wane soon. I wish I had a microscope-type camera that would allow me to photograph even more closely, perhaps look at a dissected flower to see what is going on inside, but that is beyond my budget at the moment.

Pencil sketch of the two orchid  flowers.


For now, I will content myself observing how the seed pod develops (hopefully one will develop) and recording the process in sketches. And perhaps I'll pollinate some of my other orchids later on, to observe how different species behave. It's so fascinating--no wonder there are so many natural and man-made orchid hybrids!

Sunday, March 2, 2014

Blue Gentian: from Sketch to Painting

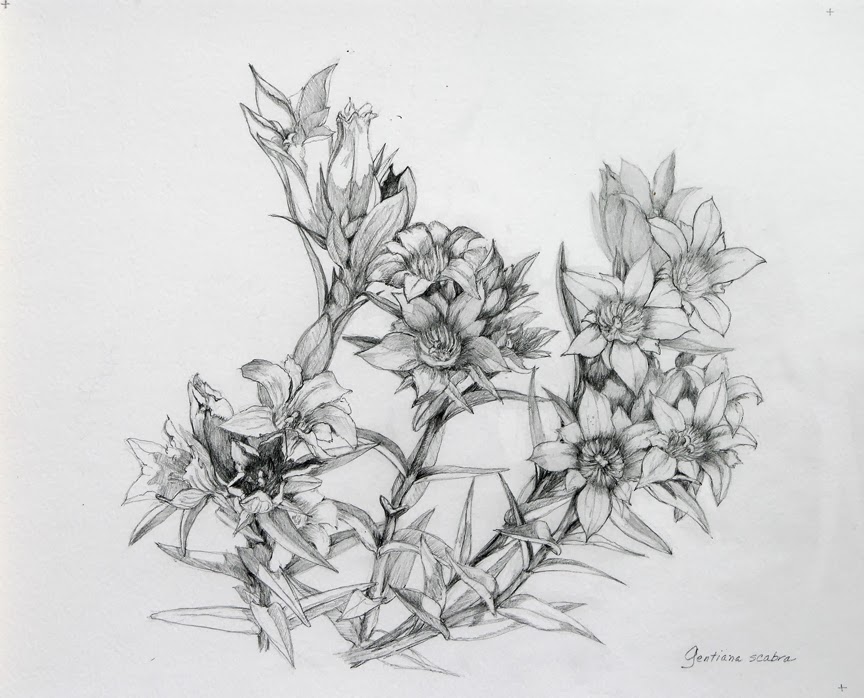
Blue Gentian - pencil sketch.

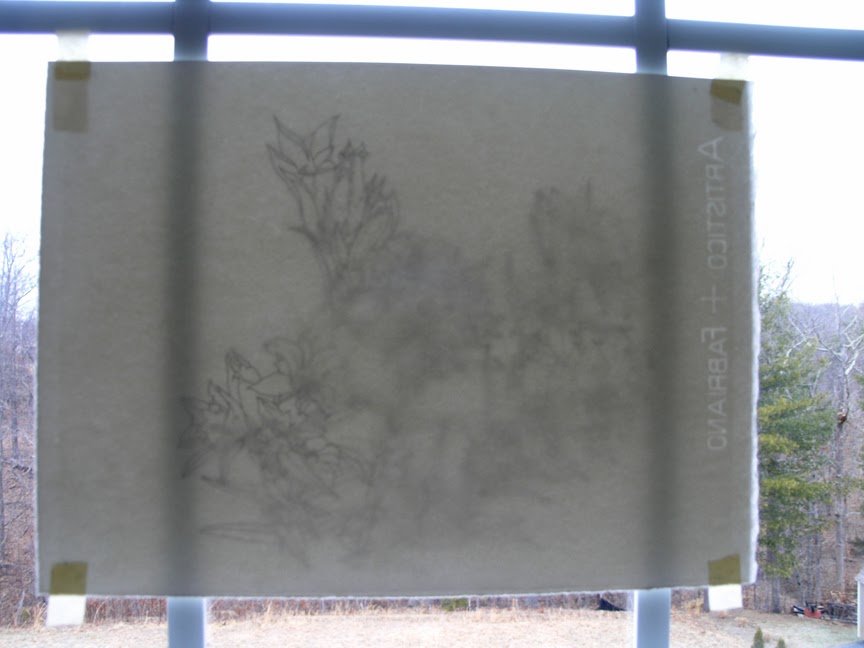
In the last couple of weeks I've been working on turning my completed sketch of the Blue Gentian (Gentiana scabra) into a full-color watercolor painting. The first part of the process was to trace the outlines of the pencil sketch with ink onto tracing paper, then transfer the line work onto watercolor paper. This is usually done on a light table, but since I don't have one, putting my paper against the window of my studio allows me to get the same effect. I learned this nifty trick from one of my teachers at Brookside Gardens' School of Botanical Art and Illustration.

Tracing the drawing on to the paper.

When I'm doing the tracing, I don't actually tape the paper to the window. The tracing is taped to the back of the paper and I move the paper all around to get the best angle for drawing the lines. And, if you look at the watermark, my Fabriano paper here is reversed (I set up the photo for demo purposes only). In practice, I am careful about which side of the paper I'm going to paint on--the reverse side is usually a bit rougher and won't take the water and pigment as well as the surface that is intended for painting.

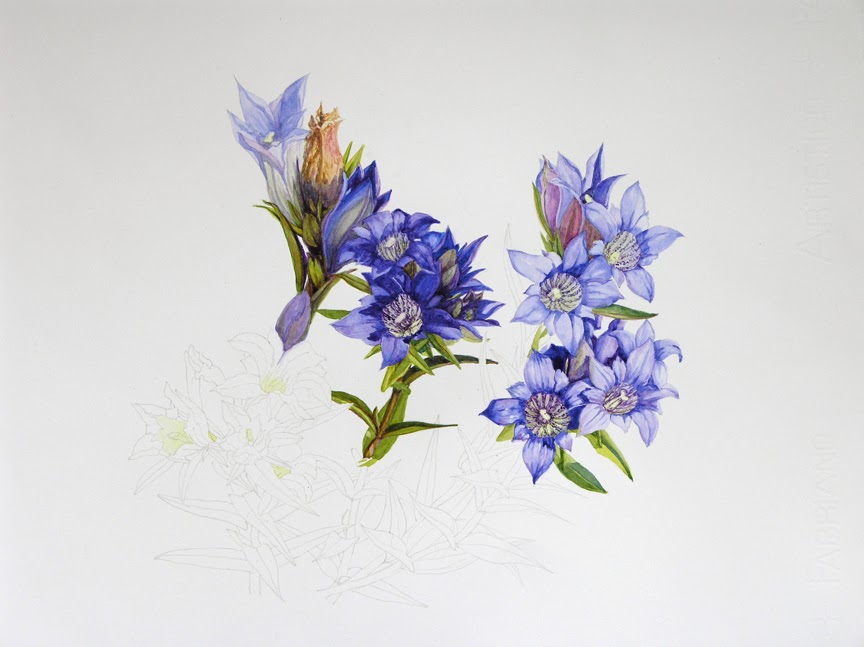
In the Process.

This is my painting in progress. Because I had worked out the lights and shadows in my study and have a pretty good idea of what I plan to do, I've been working on small portions of the painting at a time, while the area is still damp. Generally, one is better advised to lay washes on the painting throughout before going on to the details, but in this type of  really precise botanical painting, I am experimenting with working in tightly controlled areas. Eventually I may find one method is more useful than the other, who knows?